PBX 5.4 Configure incoming-call handling
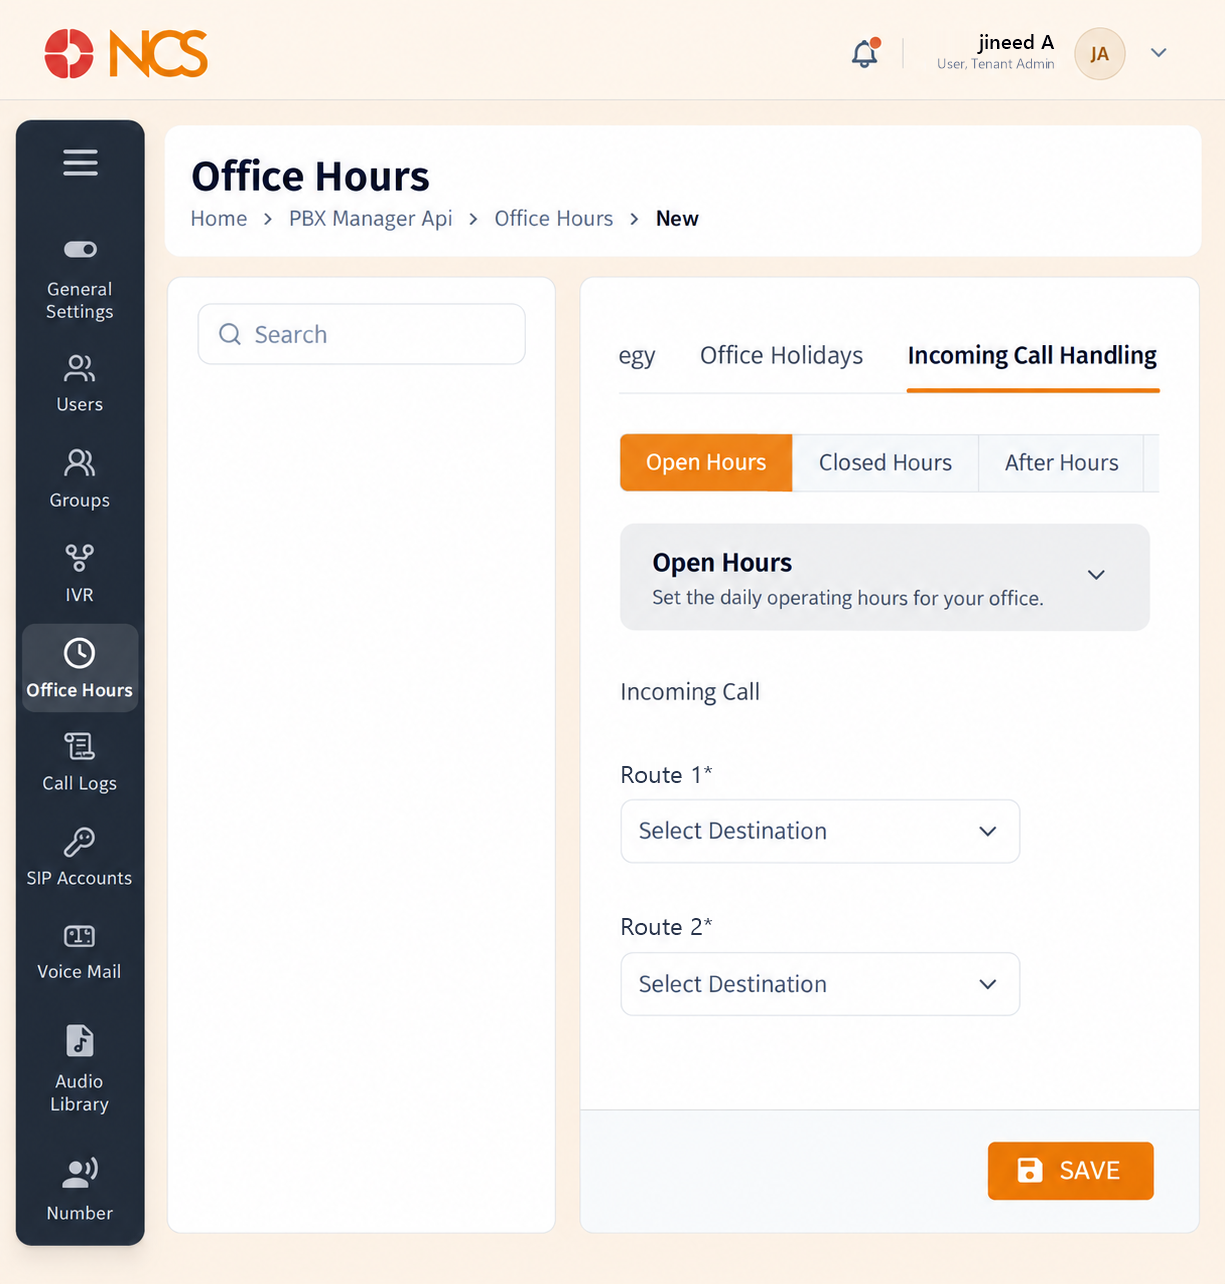
This is where the schedule becomes a routing decision. The tab carries five sub-tabs, one per schedule state.
- Open the strategy and select Incoming Call Handling.
- Select the schedule state to configure: Open Hours, Closed Hours, After Hours, Lunch Hours or Holiday Hours. Each carries its own description, for example Open Hours reads "Set the daily operating hours for your office."
- Under Incoming Call, choose the destinations. Both routes are marked mandatory with an asterisk: Route 1* and Route 2*, each with the placeholder Select Destination.
- Repeat for every state your organisation uses.
- Select SAVE.
Route 2 is your fallback, and the product treats it as required. Route 1 is tried first; Route 2 catches the call when Route 1 does not answer it. Both carry a mandatory marker, so you cannot complete a state with a single destination. Set them thoughtfully on Closed Hours and Holiday Hours in particular, because those are the states where nobody is watching for a dropped call.
Five states means five configurations, and the product will not remind you. Each sub-tab is configured independently. Work along all five before you leave this screen.
Configure every state, including the ones you think you will not use. An unconfigured state is a call with no destination. Point Lunch Hours and After Hours at voicemail or an IVR rather than leaving them blank.
Figure key, Incoming Call Handling
- Incoming Call Handling tab.
- Schedule state selectors: Open Hours, Closed Hours, After Hours, Lunch Hours, Holiday Hours.
- Route 1 destination selector.
- Route 2 destination selector.
- Save button.