SUP 1.7 Create a queue
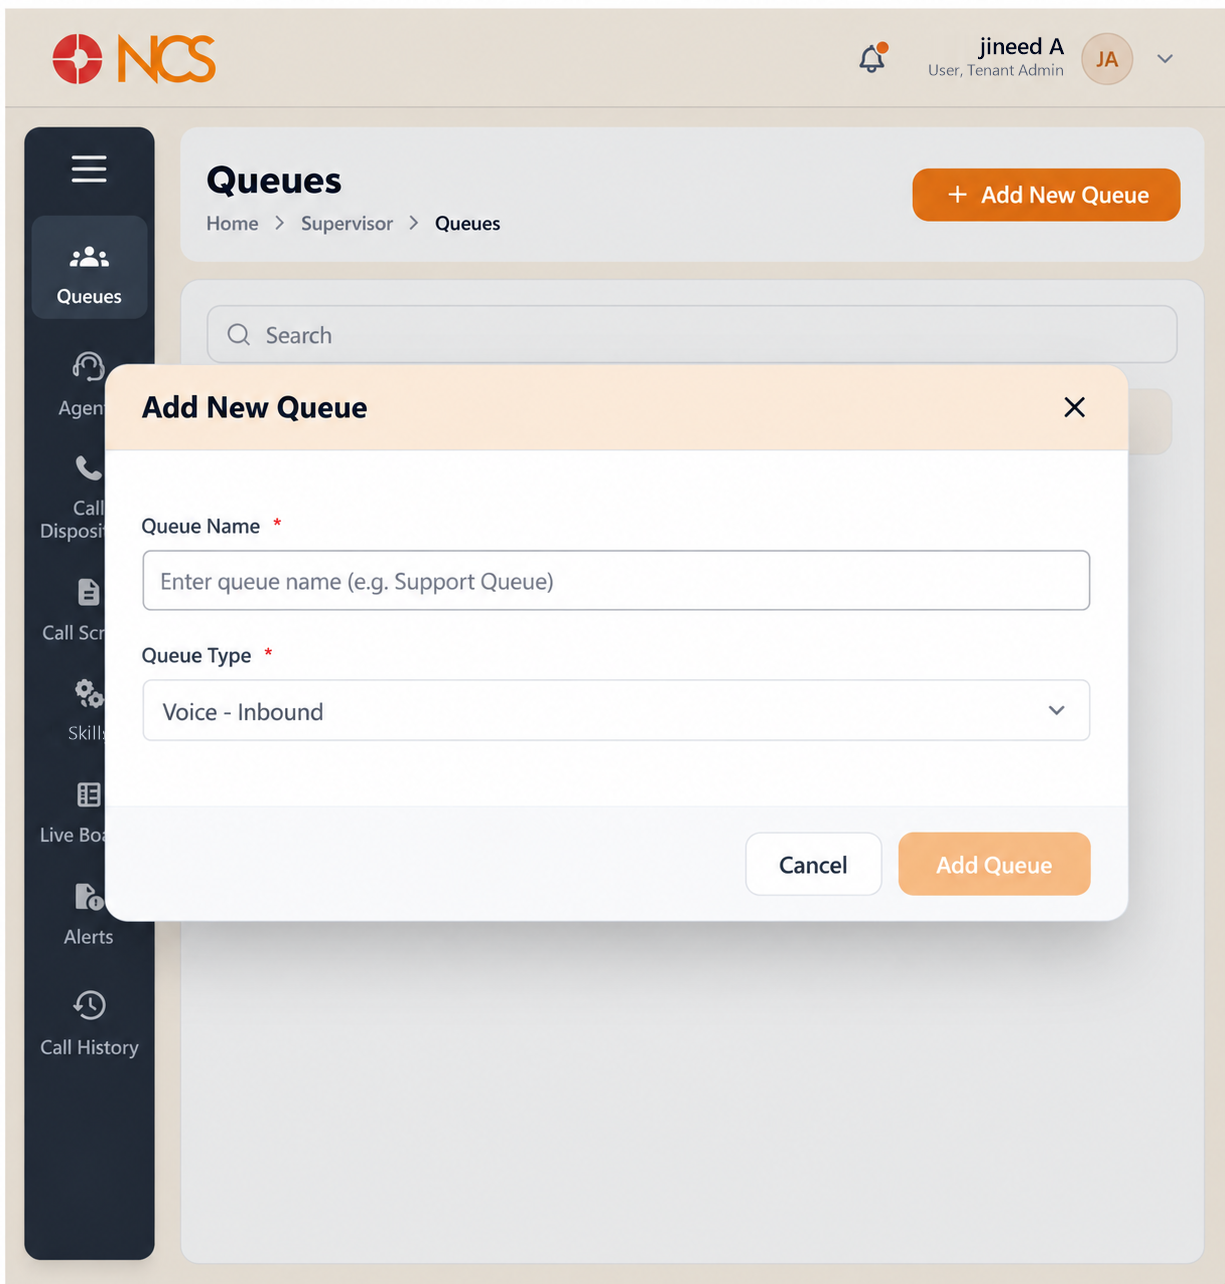
Add New Queue opens a dialogue with the same title. Both fields are marked mandatory with an asterisk.
- Open Superviseur > Fichiers d'attente.
- Sélectionnez Add New Queue.
- Saisissez le Queue Nom, placeholder Enter queue name (e.g. Support Queue). Nom it for the service the caller wants, for example Billing, not for the team that currently owns it.
- Sélectionnez the Queue Type. The options are Voice - Inbound (the default), Voice - Power, Voice - Preview, Voice - Progressive and Chat Queue.
- Sélectionnez Add Queue, or Annuler.
- Open the new queue and complete all five tabs: Aperçu, Superviseur, Agents, Appeler Experience and Paramètres.
Pacing modes vs Inbound queues. The three dialler types are outbound modes, not inbound queues. Power, Preview and Progressive are the pacing modes an outbound dialler steps through, which is also where the Parallel Dialing campaign type on the Diffusion list fits (BRD 2.1). For a queue that answers incoming callers, choose Voice - Inbound; for a queue of chat conversations, Chat Queue.
Record the Queue Type you chose. The Aperçu tab can render Queue Type blank (see SUP 1.2), so your own note may be the only readable record of it.
A new queue is not ready when it is created. It has no agents, no phone number, no wait music and no disposition. Work step 6 in that order, and assign the phone number last, so no caller reaches the queue before it can answer.
Figure key, Add New Queue form
- Titre du formulaire, Add New Queue.
- Queue Nom field, mandatory.
- Queue Type selector, mandatory: Voice - Inbound, Voice - Power, Voice - Preview, Voice - Progressive, Chat Queue.
- Annuler button.
- Add Queue button.